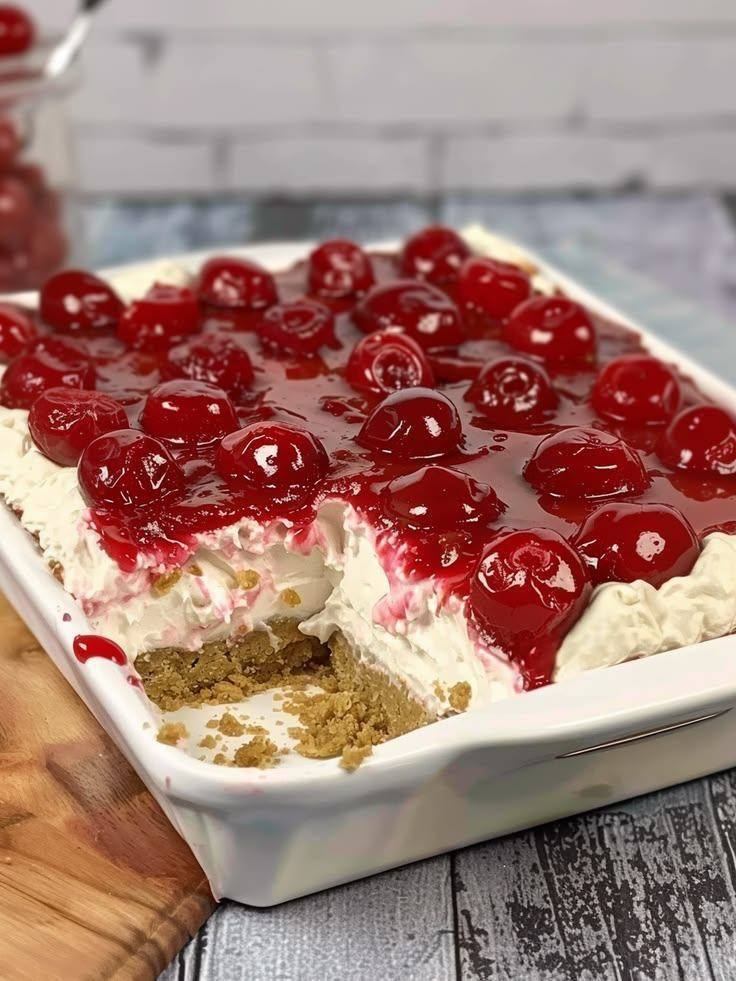
Keto Cherry Cheesecake Lush
🛒 What You’ll Need
- For the Crust: Almond flour, melted butter, and a touch of keto sweetener for a perfect crumbly base 🥧🧈
- The Cheesecake Layer: Softened cream cheese, heavy whipping cream, and vanilla extract whipped until fluffy 🥛☁️
- The Topping: Sugar-free cherry pie filling or a homemade keto cherry reduction using fresh cherries and xanthan gum for that glossy finish 🍒✨
- Extra Fluff: A thick layer of whipped keto topping to go between the cheesecake and cherries 🍦💎
👩🍳 Instructions
- Press the Base: Combine your crust ingredients and press firmly into the bottom of a white rectangular baking dish. Bake at 350°F for 10 minutes, then let it cool completely. 🥧🔥🥇
- Whip the Cream: In a large bowl, beat your cream cheese and sweetener until smooth, then gently fold in your whipped cream to create a thick, airy cheesecake layer. 🥣🌪️✨
- The First Layer: Spread the cheesecake mixture evenly over the cooled crust, ensuring you reach every corner. 🥄📏👌
- Add the Fluff: Spread another layer of plain keto whipped topping over the cheesecake layer for extra height and creaminess. ☁️📐💎
- Cherry on Top: Carefully pour your sugar-free cherry topping over the whipped layer. As seen in the photo, the bright red cherries should be nestled in a glossy sauce for that beautiful “lush” look! 🍒🎨👌
- Chill to Set: Refrigerate for at least 4 hours (or overnight). This allows the layers to firm up so you get those perfect, clean slices! ⏲️❄️🎯
- Serve: Scoop out a generous square and enjoy the perfect balance of tart cherries and rich cream! 🍽️😋🧤✨
🔥 Pro Tips:
- The “Clean Slice” Secret: As shown in the photo, using a crumbly almond flour base provides a sturdy foundation that contrasts perfectly with the soft, creamy layers above! 🥧🛡️💎
- The “Glossy” Hack: If making your own topping, ensure it’s completely cooled before pouring it over the whipped layer to prevent any melting! 🍒🎯✅