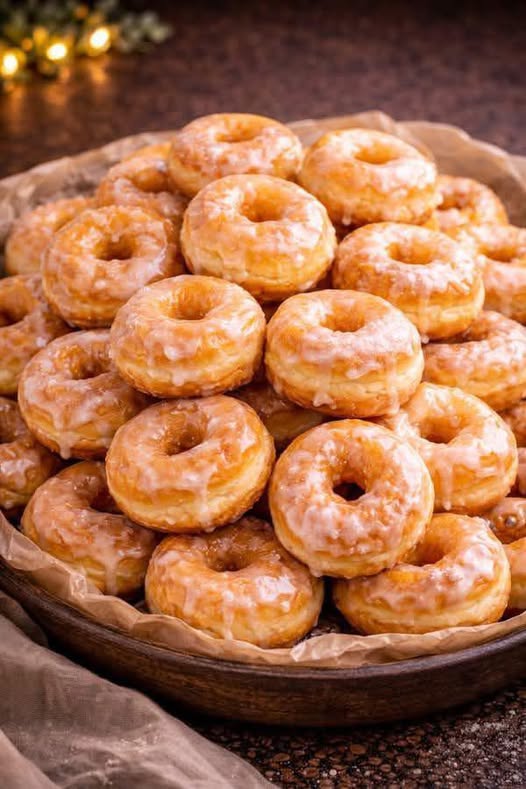
Classic Glazed Doughnuts: Soft, Pillowy & Sweet
A great glazed doughnut is all about the texture. It should be light enough to practically melt in your mouth, yet sturdy enough to hold its iconic ring shape. This recipe focuses on a rich, brioche-style dough that undergoes a slow rise to develop a deep, buttery flavor before being fried to golden perfection and dipped in a silky glaze.
Why You’ll Love This Recipe
- Authentic Bakery Texture: The yeast-leavened dough provides that airy, light interior that cake doughnuts simply can’t match.
- Versatile Glaze: The simple vanilla glaze is the perfect blank canvas—add a dash of cocoa or a drop of citrus for a variety of flavors.
- Freshness Guaranteed: Nothing beats a warm doughnut fresh from the fryer.
Ingredients
To achieve these professional results, you will need the following key components:
| Category | Item | Quantity | Note |
| The Dough | All-Purpose Flour | 4.5 cups | Sifted to ensure a smooth, airy dough. |
| Whole Milk | 1.25 cups | Warm (about 110°F) to activate the yeast. | |
| Active Dry Yeast | 2.25 tsp | One standard packet for a reliable rise. | |
| Granulated Sugar | 1/3 cup | Adds just enough sweetness to the dough. | |
| Unsalted Butter | 1/2 cup | Softened; provides richness and a soft crumb. | |
| Large Eggs | 2 | At room temperature for better emulsification. | |
| The Glaze | Powdered Sugar | 2 cups | Sifted to avoid any lumps in the finish. |
| Whole Milk | 1/4 cup | Adjust for your desired glaze thickness. | |
| Vanilla Extract | 1 tsp | For that classic, aromatic sweetness. |
Instructions
1. Activate the Yeast
In the bowl of a stand mixer, combine the warm milk and a tablespoon of the sugar. Sprinkle the active dry yeast over the top and let it sit for 5–10 minutes until it becomes frothy.
2. Mix and Knead
Add the remaining sugar, softened butter, eggs, and 2 cups of the flour. Use the dough hook attachment to mix until combined. Gradually add the remaining flour, half a cup at a time, until the dough pulls away from the sides of the bowl. Knead for 5–7 minutes until the dough is smooth and slightly tacky.
3. The First Rise
Place the dough in a lightly greased bowl and cover it with a damp cloth or plastic wrap. Let it rise in a warm, draft-free spot for about 1 to 1.5 hours, or until it has doubled in size.
4. Shape the Doughnuts
Punch down the risen dough and turn it out onto a floured surface. Roll it out to about 1/2-inch thickness. Use a doughnut cutter (or two different-sized round cutters) to stamp out the rings. Place them on a parchment-lined baking sheet and let them rise again for 30–45 minutes until they look puffy.
5. Fry to Golden Perfection
Heat about 2 inches of vegetable oil in a heavy-bottomed pot to 350°F. Carefully drop 2–3 doughnuts into the oil at a time. Fry for about 1–2 minutes per side until they are light golden brown. Use a slotted spoon to transfer them to a wire rack set over a tray.
6. Glaze and Set
While the doughnuts are still warm, whisk together the powdered sugar, milk, and vanilla in a shallow bowl. Dip each doughnut halfway into the glaze, then place them back on the wire rack to let the excess drip off and the coating set into a crackly finish.
Pro-Tips for Success
- Temperature is Key: Use a thermometer to keep your oil at a steady 350°F. If the oil is too cold, the doughnuts will be greasy; if it’s too hot, they will burn on the outside before the center is cooked.
- The “Warm” Dip: Glaze the doughnuts while they are still warm to the touch. This allows the glaze to thin out slightly and coat the surface more evenly.
- Don’t Over-Knead: Kneading for too long can develop too much gluten, resulting in a tough, bread-like doughnut rather than a pillowy one.